Make monotub for mushrooms by your own
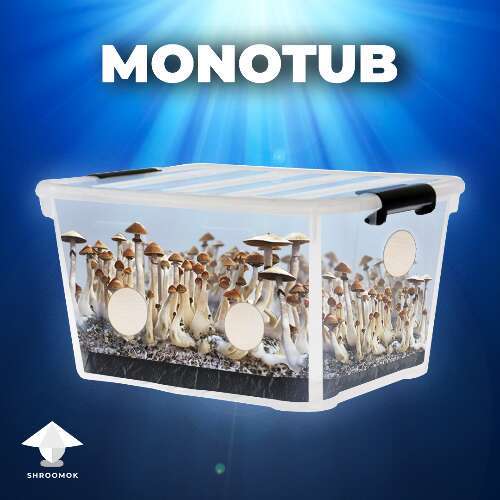
Make effective Monotub for mushroom growing and increase your yield
There are so many different ways how to get mushroom harvest...
Monotub is just one of the methods we are going to discuss. Monotub is the most desirable tek of magic mushroom growers for cultivation at home.
Other recommended teks:
✅ Bottle-tek or how to grow mushrooms in plastic bottles
What is monotub
Monotub is a type of fruiting chamber for mushroom cultivation. The volume of such tub can be from 6 Qt for mini-monotube (aka shoeboxes) to 32, 54, 80 Quart sizes and even bigger. Average tubes are considered optimal.
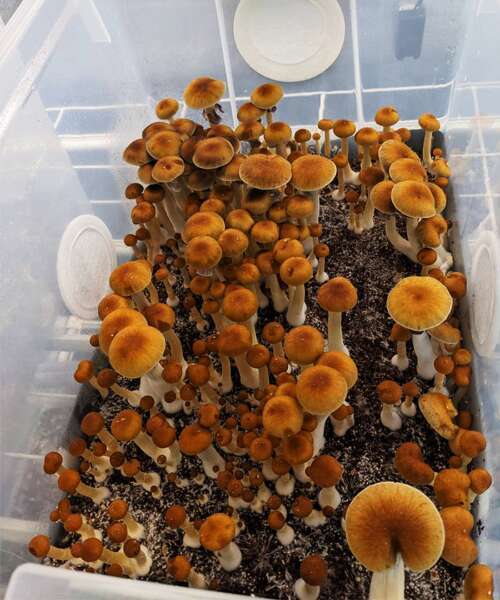
The entire bottom of MonoTube is used for one mushroom block/cake. We mix fully colonized grain spawn and bulk (fruiting) substrate right in this tub.
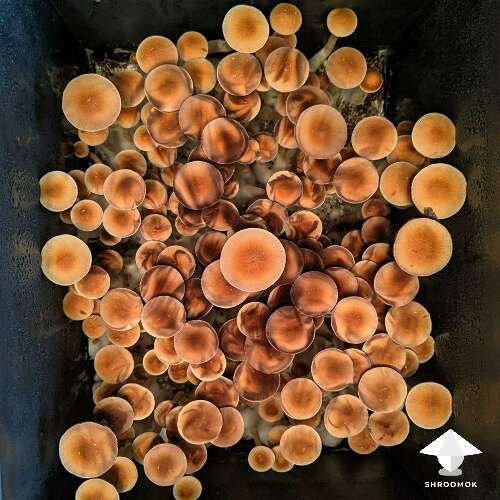
Pros and cons of MonoTub
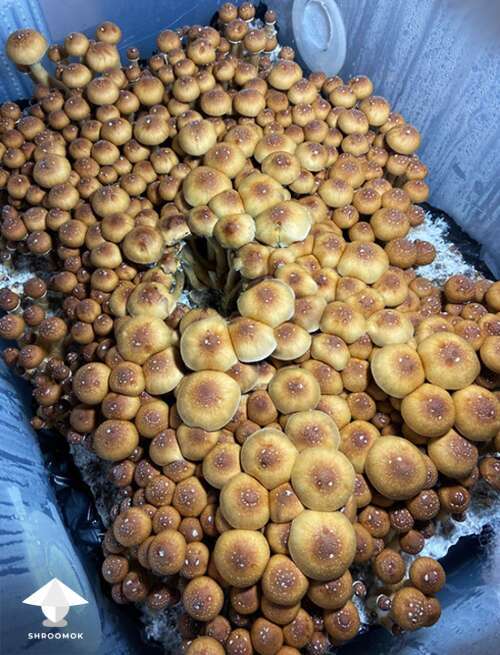
🟢 Once made and forget it. Properly made MonoTub works as an autonomous system. All additional equipment is optional (fan, fogger/humidifier, censors etc). Additional misting or manual FAE also optional. Usually monotub open up only for harvesting or few times during fruiting period for check-up.
🟢 More harvest (in comparison with PF-tek, small mushroom cakes in Grow Box and Bottle-tek). On average 54 Quart monotub produces 2-4 productive flushes = ~2-3 kg of mushrooms and even more!
🔴 Monotub is about "putting all the eggs in one basket". For spawn to bulk you mix a few spawn jars or spawn bags in one tub. If monotub contaminated, all the amount of mushrooms that could have been given from each small mushroom cake separately will be lost. This is the only reason why monotub isn't recommended for newbie growers.
🔴 Dead zones in monotub. It is a common issue for any monotub configuration. If air holes/gaps were made improperly, then natural airflow won't work.
It cause:
- contamination, because contaminants prefer stagnant air;
- overlay due to high CO2 concentration;
- dry top layer, when relative humidity in monotub is high. This case is always confused, because our hygrometer shows us 90-99%, but top layer becomes dry. It means relative humidity maintained mainly by evaporation from top layer and goes away through air holes extremely fast. As a result we have problems with pinhead initiation, low yield or we loose all our possible harvest.
❗️MonoTub, built incorrectly, becomes a regular Grow Box. Any autonomy of this design disappears. It has to be additionally misted and quite often fanned manually as a GrowBox
Why does some MonoTubs have air holes while other don't? Monotub configurations
The very first and the best way to increase your yield is making balanced fruiting chamber. It gives a chance to unlock mushroom potential for fruiting and avoid losses due to possible contamination or genetic mutation.
There is no right or wrong way to fruit mushrooms. They need fresh air, high relative humidity, appropriate temperature and a little bit of light. Any method you can come up with to give them those required things, should work. Your choice of growing tek depends on your experience, budget, preferences, mushroom species and even imagination
Let's figure out different MonoTub configurations.
Modified MonoTub
Modified monotub (neglect-tek) consists of plastic transparent tub that has been modified with holes and closed tightly with transparent lid. These holes (air vents) on the proper distance and height help to create air flow, fresh air exchange (FAE) and maintain humidity due the basic laws of physics: temperature changes inside and outside tube, temperature differences on the bottom and on the top of tub create air flow and influence on the relative humidity.
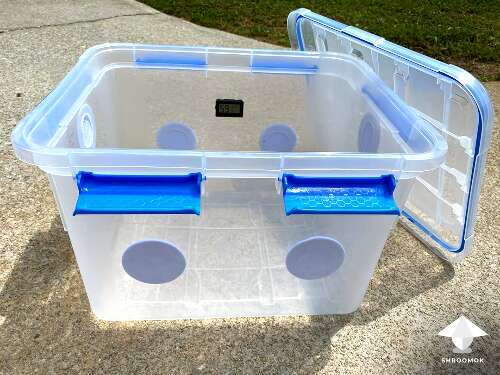
Dead zones is the main issue for such configuration.
Unmodified MonoTub
Unmodified monotub (neglect-tek) is a plastic transparent tub with lid, but without air holes. For fresh air exchange (FAE) during fruiting period the lid is flipped upside down or just don't close tightly. This creates air gaps around the lid locks which is important for allowing air exchange as well as substrate moisture regulation.
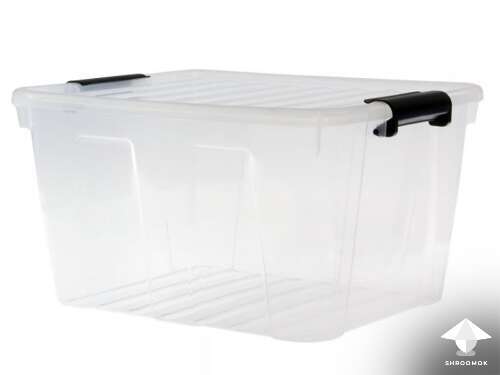
Humidifier/fogger often used for this tek. It helps with FAE and push out CO2.
Dead zones is the main issue for such configuration.
Double Tub or Twin Tub
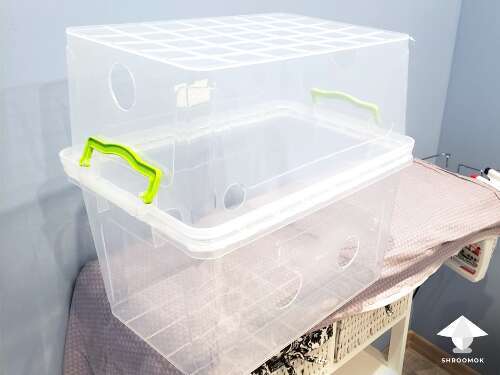
Double tub or Twin tub consists of two plastic containers and connected to each other by the container tops.
This configuration has a doubled volume of fruiting chamber and this is the main advantage for fruiting period. Can be made with air-holes (for average volume bins).
Shoeboxes tek or Mini-tub
Usually 6Qt plastic shoeboxes use for such fruiting chamber. Can be made with air holes for fresh air exchange in the same as for modified monotub
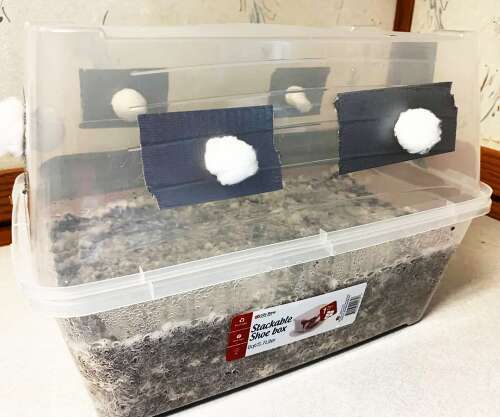
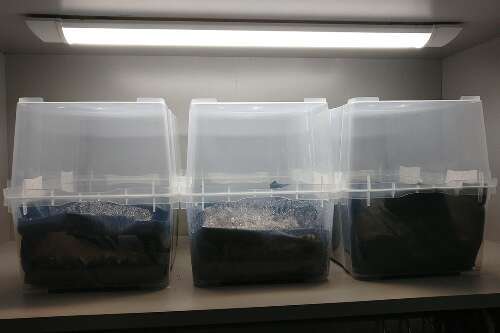
Modification without air holes, where air gaps between two bins are enough for air flow
Influence of external factors on the MonoTub efficiency
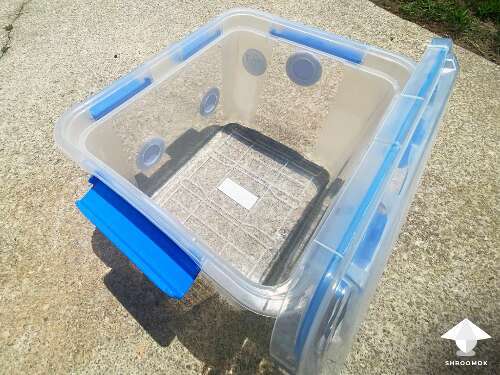
1. Relative humidity. If RH in your room below 30%, then you won't be able to use the monotub! Whatever holes we make in it, the moisture will leave it. Making too small holes in a monotub means CO2 accumulation in it and monotub stops working. In such case you need to use humidifier either for room or inside monotub.
Normal RH for room is 50-60%. This will allow you to make effective hole diameter in monotub without fear all moisture will evaporate or high CO2 will accumulate in it
2. Evaporation rate, diffusion, temperature. If the relative humidity of the outside air is below 100%, the monotub can essentially be represented as a mixing chamber.
The outside air passes through the upper holes, mixes with the humid air inside the tub and leaves it through the lower holes. This principle of operation of the monotub, can be described as the operation of an isobaric system (partial pressure difference). And also isothermal process (because of thermogenesis process).
Mycelium is eating the substrate, it creates heat whilst digesting. This causes a thermal air current to develop inside the monotub.
This process can't come to equilibrium because the two volumes "room and container" are not commensurate in volume. When the partial pressure is equalized, due to the difference in relative humidity, the system will come to equilibrium when all the moisture inside the container has evaporated, and then the system will be in balance.
When the air is mixed, at the boundary of the holes, a third, transitional process occurs.
In fact, we have different chemical composition of air. Inside the monotube the air contains a large amount of carbon dioxide, and it is ten times different from the carbon dioxide concentration in the atmosphere!
3. Temperature difference and condensation. Condensation occurs due to outside air temperature drop.
Don't assume that condensation can occur at 100% humidity only
The greater the difference in temperature, the more condensation will occur. And vice versa, the higher the air temperature, the less condensation will be on the walls of the monotub. This critical temperature is also known as the "dew point" and can be observed at almost any air humidity.
Walls of plastic container don't have as good heat transfer as glass or metal. That's why due to evaporation process, the temperature will decrease, and the walls will fall out with condensation. At the same time the air inside container won't have humidity equal to 100%.
How Monotub works
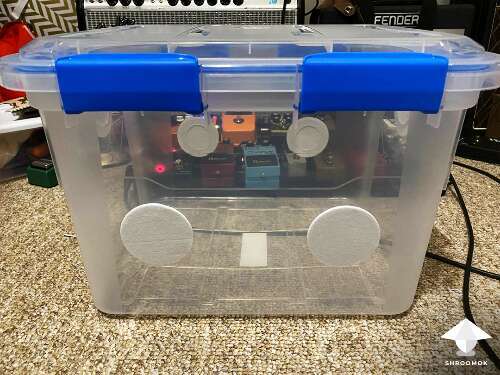
According to the previous paragraph, Monotub can be represented as a simple mixing chamber.
Mycelium is a living organism that is eating nutrients in the substrate and releases heat during digestion. As a result, a thermal airflow occurs inside the Monotube.
The Monotub works in the following way:
- Mycelium is spawned into bulk substrate, mixed and placed into the Monotub (with the holes taped over to prevent FAE till bulk substrate colonisation).
- Once the mycelium 80-100% colonised the substrate the tape is removed from the holes in the tub and filled with synthetic filters, polyfill, micropore tape or sponge.
- The air around the substrate is slightly heated due to mycelium heat generation during development.
- As you know, the heated air rises up. And then it comes out through the upper holes in the tub.
- At the same time fresh, cooler air enters through the lower holes of the tub.
- To prevent the substrate from drying out due to too much FAE, the polyfill in the lower holes is packed tightly, while the polyfill in the upper holes is packed more looser.
- Fresh air is a trigger for pinning process and mushroom fruiting.
❗️The direction of air flow can be changed manually (from top to bottom) if we use PC fan on the lid or on the wall of Monotub for additional FAE
How to make a MonoTub
Let's figure out modified monotub as a fruiting chamber for mushroom cultivation
Basic rules for effective MonoTub
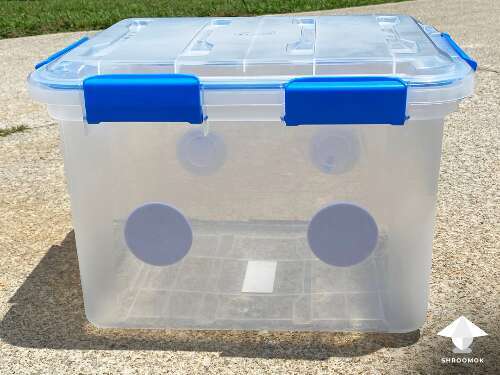
1. Spawn + Bulk substrate = no more than 30% of the MonoTub volume
2. Lower holes. For every 6-8 inch (15-20 cm) of length should be placed one hole (on the long side of the tub). It is often 2 holes on one side and 2 holes on the opposite side
3. Upper holes. The cross-sectional area of the upper holes must be half of the lower hole. It means if all holes are drilled with the same drill bit diameter, then we need 2 holes instead of 4
Materials needed for modified monotub
1. One clear plastic tub with a lid 32-91Qt sizes

Shroomok's Choice on Amazon:
Clear Plastic Tub with Lid - 68Qt - 1 Pack $39.99
2. Drill with a two-inch hole saw bit (or heavy-duty pair of scissors or gardening snips) for making air vents in monotub
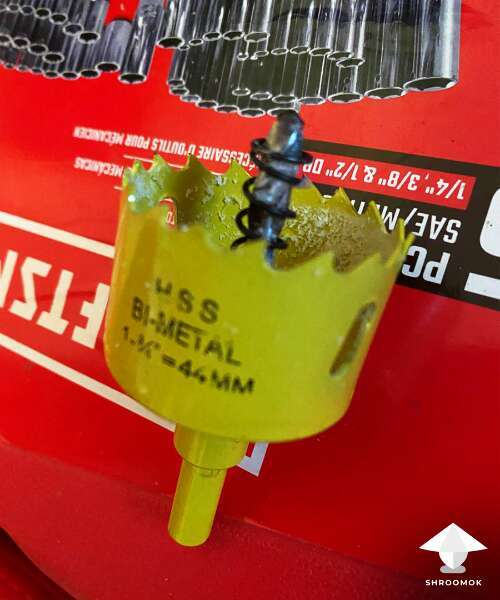
Shroomok's Choice on Amazon:
2 Inch BI-Metal Hole Saw - $13.98
3. Synthetic filters, or Poly-fill, or micropore tape, or sponge for air holes help to protect incoming air against contaminants
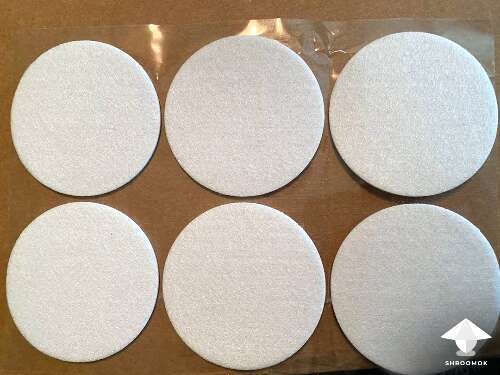
Shroomok's Choice on Amazon:
Micropore Tape $8.80
Poly-Fil Premium Fiber $13.99
4. Thick opaque black trash bag or black spray paint suitable for use on plastic. We need it to protect the bottom of our tub from the light and avoid side pinning. Better to use PE bags inside, we'll discuss details later.
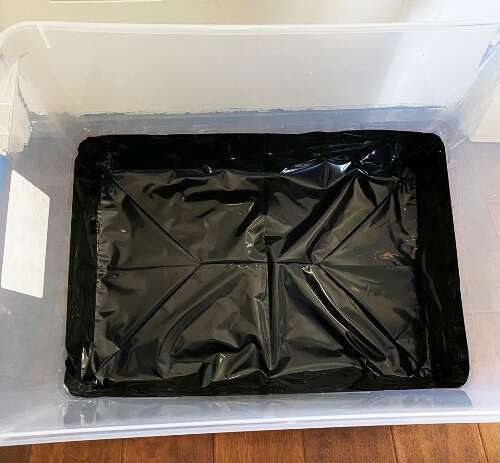
Shroomok's Choice on Amazon:
Polyethylene black bags - $19.99
5. Duct tape or other heavy-duty tape. It is needed for closing air-vents for bulk substrate colonisation.
Shroomok's Choice on Amazon:
Duck Tape, 1.88 Inch x 60 Yard, Silver - 1 Pack - $7.95
How to set up monotub
Step 1. Prepare all needed materials are listed above.
Step 2. Attach the drill piece to the head end of the drill. Make 6 air vents in tub.
Make 4 lower holes (length side). They should be about 4-6 inches (10-15 cm) from the bottom of the MonoTub.
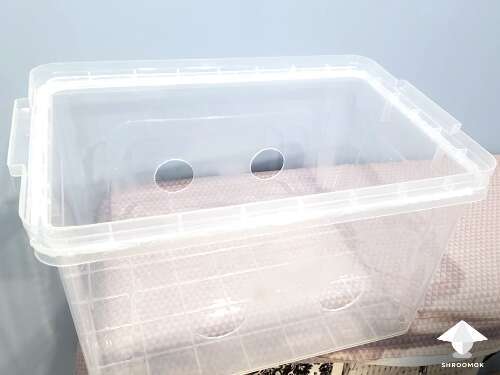

Make 2 upper holes (width side). They should be placed about 1 inch (2 cm) from the top of MonoTub.
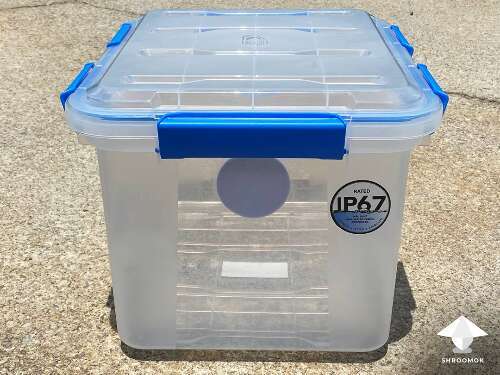
💡 You can paint the line of substrate level and air-holes before making them. You can make holes by melting with hot round piece. Do this outside in an open area with a mask, because melting plastic isn’t the healthiest
Step 3. Take a knife and clean up the edges that may remain on the holes.
Step 4. For bulk colonisation period close the air holes with duct tape tightly.
For fruiting period cover air-vents with filter discs /poly-fill /micropore tape /sponge. It allows air exchange, works as a filter for incoming air to prevent contaminants
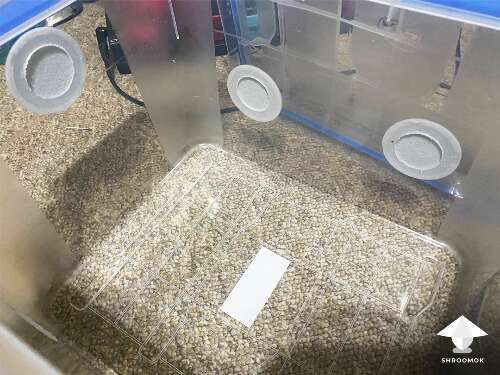
❗️Remember, right after spawn to bulk (for bulk colonisation period) you should totally close air vents! Use duck tape for it. Once 80-100% of top layer colonised remove duct tape for FAE. From this moment fruiting period has started!
Step 5. Take a piece of thick opaque black trash bag and cut it to size of MonoTub, so that edges of the bag come up to under the lower holes in the MonoTub. Place it inside your tube. Tape the sheet to the sides of the MonoTub

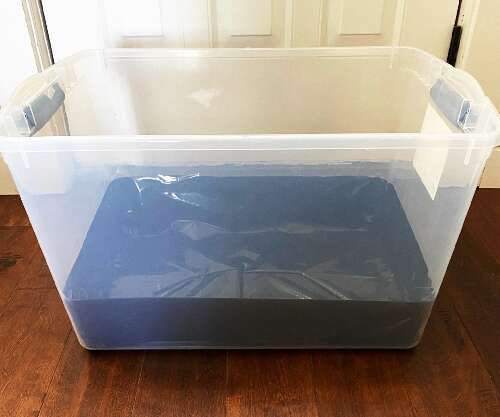
The lining inside is optional, you can use it or skip it. Although it has some practical advantages.
Inside lining is helpful for harvesting and further soaking in water. You can pull the whole block out without touching it or breaking it. Mushroom cake evaporates some water and mycelium absorbs water from the substrate. As a result mushroom cake begins to shrink. When the substrate shrinks it creates favorable microclimate between the substrate and the MonoTub walls. Such conditions are perfect for developing side pins. When you line the MonoTub inside, the lining shrinks with the mushroom cake as growth progresses stopping this from happening. However side pins is not a problem at all and they can grow even if you use lining inside.
Step 6. Keep the lid of monotub closed during bulk colonisation and fruiting period.
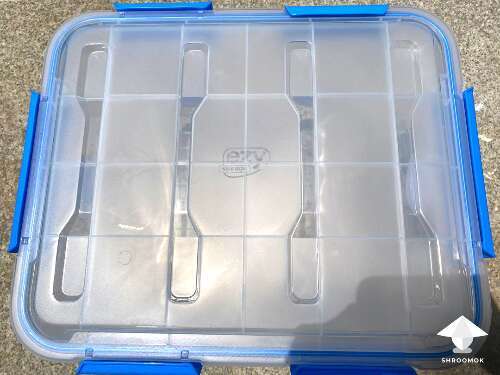
Step 7 (optional). You can add some optional gadgets in MonoTub (light, fan, temperature/humidity/CO2 detector, humidifier, sensors, controllers etc). At least thermometer and hygrometer would be useful.
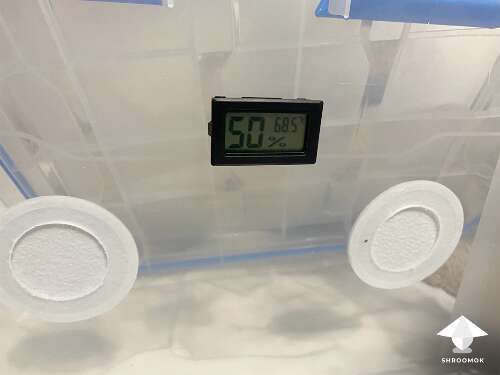
All upgrades are optional for Psilocybe Cubensis cultivation, but can be necessary for Psilocybe Natalensis and Panaeolus. I suggest to use humidifier and fan for these species, because they required more oxygen
MonoTub is ready for the next step - Spawn to Bulk.
🔴 Check out guide with recipes: Spawn to Bulk
Upgrades for fully automated MonoTub
All these devices are optional if your MonoTub is made properly. They help to maintain and control necessary fruiting parameters 24/7 for newbie growers and adjust fruiting conditions if monotub has bad airflow and issues with relative humidity.
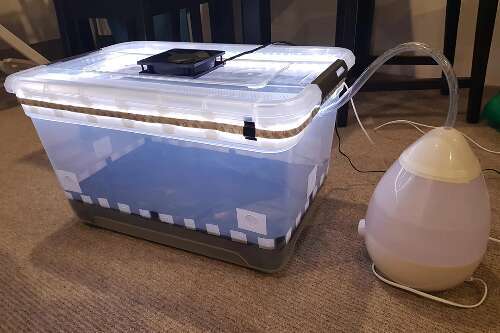
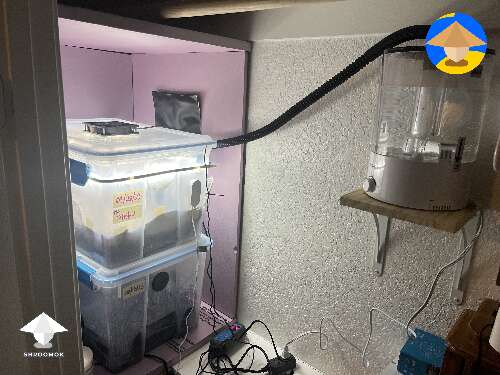
In fact such configuration is something between monotub and growbox. Because true MonoTub is totally autonomous fruiting chamber.
Experienced growers feel the cultivation process and can check all parameters on the eye. But as I mentioned before Psilocybe Natalensis and Panaeolus are more sensitive to CO2 than Psilocybe Cubensis. That's why humidifier, PC fan or air pump can be extremely useful for these species!
1. Fruiting parameters sensor. Temperature, humidity, CO2 detector to control fruiting conditions in monotub.
Shroomok's Choice on Amazon:
Govee Bluetooth Digital Hygrometer and Thermometer, Remote App $11.99
Mini CO2 Detector, Temperature, Humidity $45.99
INKBIRD WiFi Air Quality Monitor, CO2, Temperature, Humidity $79.99
2. Light for monotub. Additional light is optional shrooms, but recommend. Why? Briefly, light influences mushroom metabolism and pin setting. More info in the section: Fruiting period. Pinhead initiation. Mushroom growth parameters
🔴 Natural light is suitable, but only diffused soft light. Avoid direct sunlight!
Shroomok's Choice on Amazon:
LED light bar with Memory Function $16.99
LED Desk Lamp with Flexible Gooseneck $16.99
LED Light Strip, 6500K - 16.4ft $19.99
3. Humidifier. Effective with humidity controller and on/off cycle according to RH level in monotub
Ultra Fine Mist Spray Bottle $8.99 - cheap option for manual misting
Fogger with Humidity Controller, Extended Hose, 4L $59.99
4. Humidity controller to maintain and control stable relative humidity 90-99%
Inkbird Humidity Controller for Mushroom Growbox/Monotub/Grow Tent $36.54
5. Fan for additional air flow and FAE. Can be installed on the lid or on the wall of the tub.
Quiet PC Fan with power plug cord $19.99
❓ Question: I'm interested about PC fan on the top (or on the side). It's just a hole for the fan or filter used too, between the the hole and PC fan? Thanks
❗️Shroomok answers: The principle of PC fan in monotub the same as a ceiling-mounted exhaust fan in your bathroom. The PC fan works by PULLING the air up instead of the PC fan blowing air into the tub. So that it pulls old air out of the box while force the fresh air to be pulled in through the air vents, which is protected with polyfill/synthetic filters/sponge where it can be filtered. Place the PC fan on the correct side and check the airflow direction.
6. Cycle timer for light/fan/humidifier. You can set up on/off cycle for fan (for example, every 1 hour for 10 sec or 4-6 times/day for 1 minute). For light (12 hours on/off cycle). For humidifier (for example, every 1 hour for 10 sec or 4-6 times/day for 1 minute).
BN-LINK Short Period Repeat Cycle Intermittent Timer $26.99
Digital Thermometer Hygrometer Temperature Controller $49.99
MonoTub modifications by Shroomok Growers Community
You can change, upgrade your fruiting chamber in a different way. Experiment and you'll come up with the best solution for you. Don't afraid to make something different. The sky is the limit!
Let me show you more examples.
❇️ Black MonoTubs with shared automative humidifier system and temperature/humidity controller. Covered by clear plastic stretch wrap film (without lids on top)
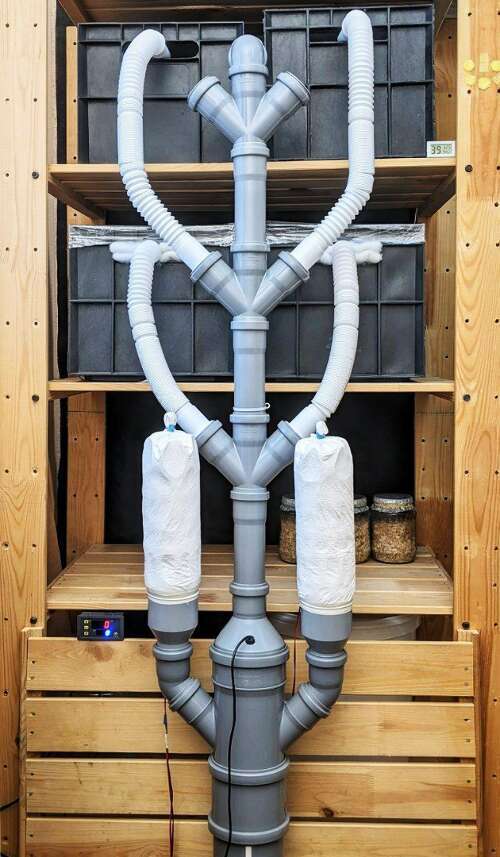
Shroomok's Choice on Amazon:
Black Storage Bin with Lid - 40/53Qt - 6 Pack - $80.99
Temperature/humidity controller - $24.99
Mxmoonant 6 Head Ultrasonic Mist Maker for DIY powerful humidifier $128.90 - for such fogger you need water tank and plastic pipes
❇️ MonoTubs with temperature and humidity controllers
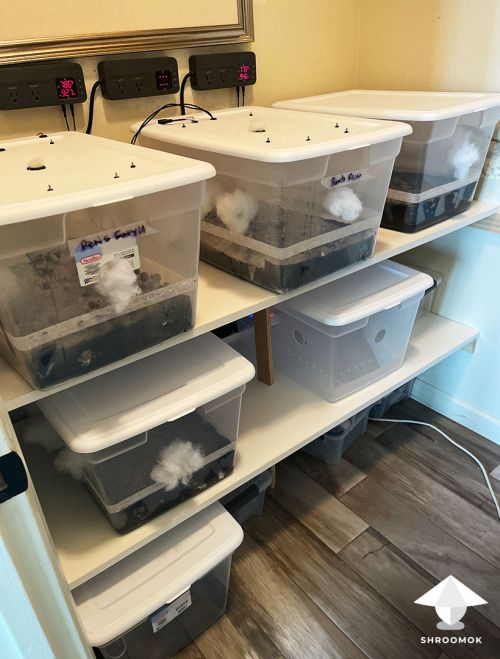
Shroomok's Choice on Amazon:
Modular Stackable Storage Bins - 66 Quart - 2 Pack $55.69
Polyethylene black bags - $19.99
Inkbird Temperature + Humidity Controller ITC-608T $69.99
❇️ Plastic seedling box with lid. Modified with additional air holes, PC fan on the top of the lid and temperature/humidity controller.
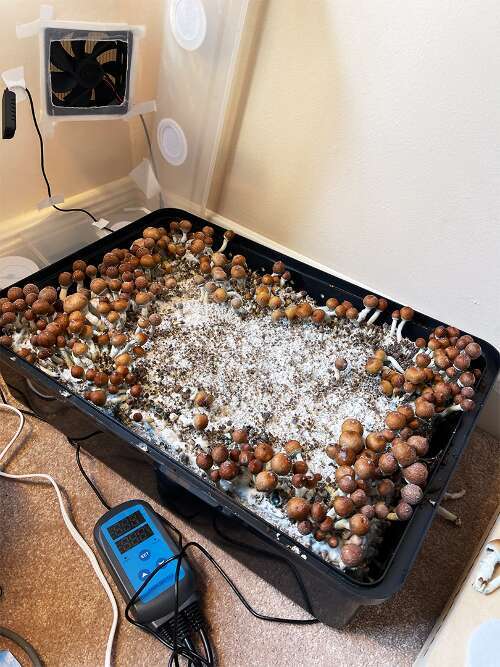
The only issue you can see here is too much fanning (currently 15 seconds every 30 minutes). Top layer loose moisture, there are no shrooms in the centre. But near borders more humidity and shrooms are there!
Try to use PC fan 3-4 times/day and mist the walls of the tub additionally if needed (according to humidity controller data). If natural airflow in such tub works properly you can skip additional fanning at all.
Shroomok's Choice on Amazon:
Seedling box with lid and ready-made air holes - $30.38
Quiet Fan with power plug cord- $19.99
Humidity Controller for monotub - $42.99
LED White Light Strip 6500K $19.99
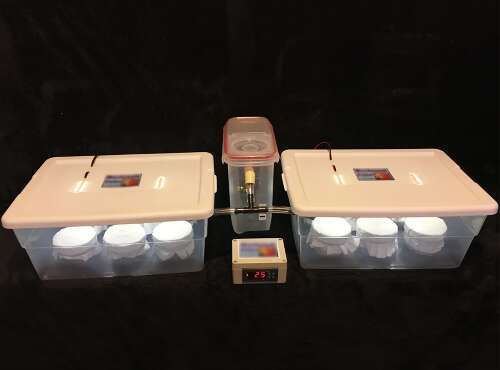
❇️ Twin fruiting chamber. Two tubs, 16 Qt each. Humidifier shared for 2 tubs. Ultrasonic humidifier activates with humidity controller to create a fine mist (turn on/off to maintain needed relative humidity). Light LED strips on the top of lids (inside the tubs).
📸 For more examples check out MonotTub photo gallery
Join Shroomok Community on Discord and Reddit for questions and sharing experience or leave your comments below.
If you find this guide helpful, please consider supporting my work with a cup of coffee on ☕️ buymeacoffee
Have a happy growing!
Peace, Shroomok ❤️


I
Can i grow in un transperant. plastic box
@mtk Yes, you can use non-transparent plastic boxes. You can see an example with black boxes at the end of the current article ;)
@mtk However, there is a disadvantage of using non-transparent tubs. You won't be able to notice possible signs of contamination on the bottom and from the sides of your mushroom cake